Votre panier est vide


Making nut milk sounds tricky but in fact it’s incredibly simple. Our recipe is paleo-friendly and vegan, and if you follow our blending method the nuts remain raw so that you end up with a plant-based milk teeming with live enzymatic goodness. With the Luvele Vibe blender in your kitchen, the hands-on time is about 10 minutes; even less with practice. Scroll down for the how-to video.
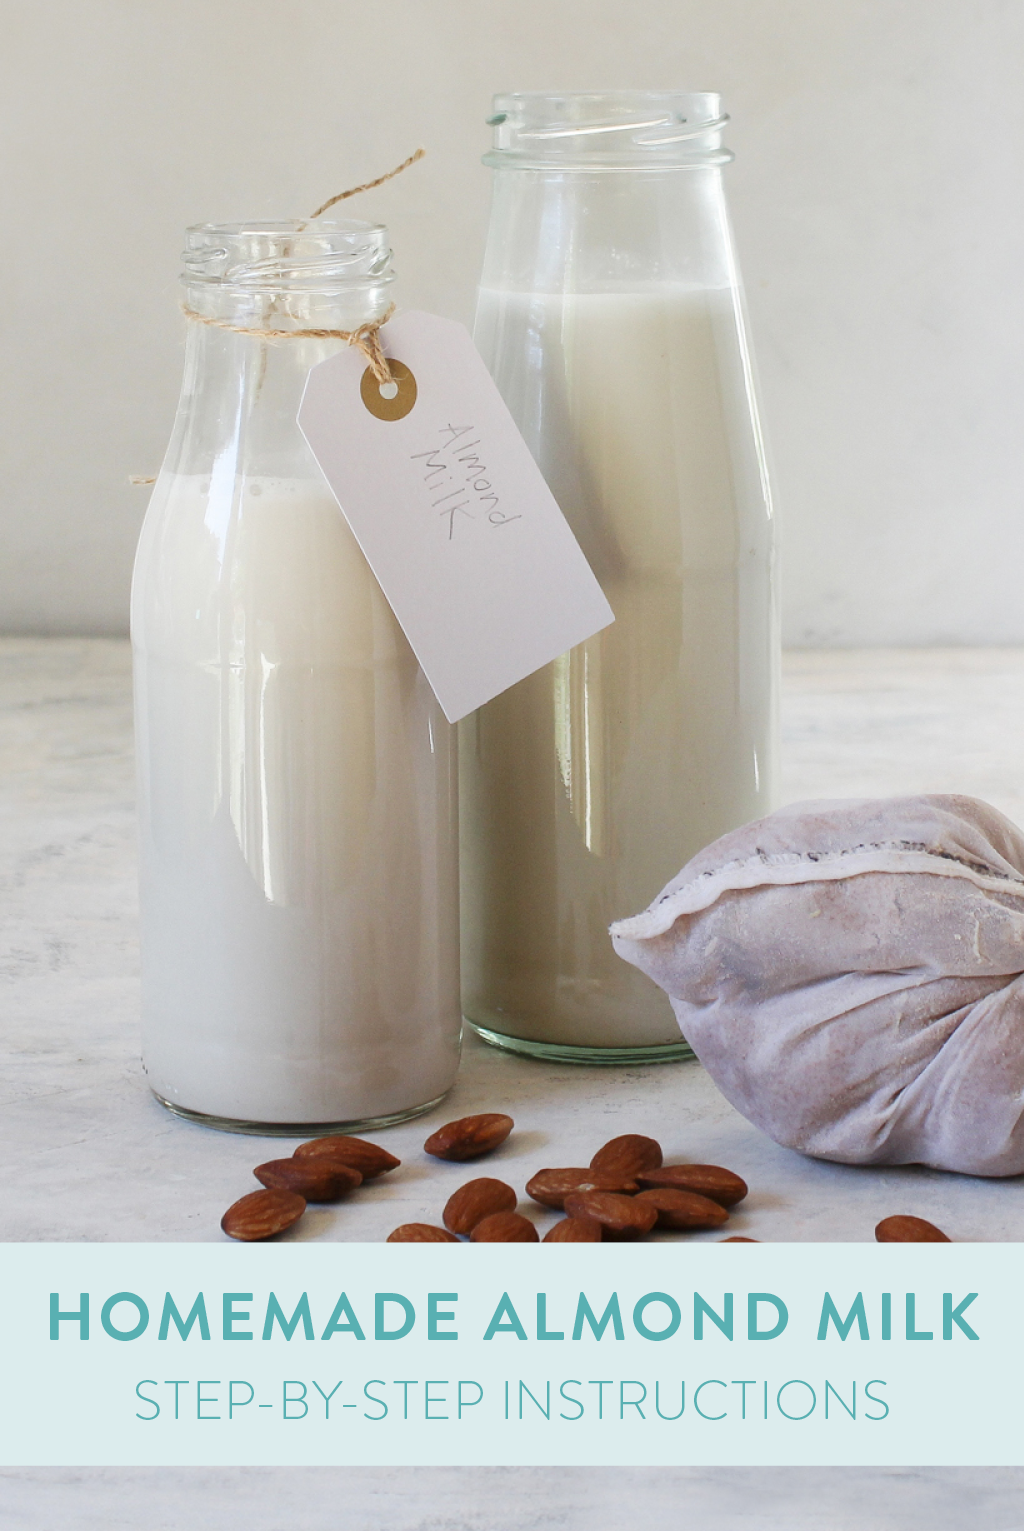
If you’ve sampled homemade nut milk, you’re sure to agree that nothing compares! Commercial almond milk might be convenient but nutritionally it just doesn’t stack up – it’s basically bereft of nutrients, and often contains additives and preservatives. Our homemade nut milk recipe puts you in control of the finished product – the freshness of the nuts, the texture, and the sweetness. We even give you three exciting flavour variations to try when you feel at ease with the process.
Nut milk can be made from any nut you fancy. Experiment. I tend to stick to almonds because they are readily available, are incredibly nutritious, affordable to buy organic and a rich source of prebiotic. Food for your good gut bacteria, that is. But, first up, always use raw nuts. Organic and raw is even better. The toasted variety may be tastier, but the heating process destroys some of the nutrients as well as their prebiotic potential. I also vouch for skin on rather than blanched. Basically, nuts with zero processing and zero pesticides are best. If you can find locally grown nuts, even better!
I know this may seem a pain but soaking and activating raw nuts is absolutely essential. Nuts are amazing but can be hard on your gut if they are not prepared properly. There are several reasons why activating nuts for nut milk is necessary. Straight up, nuts are full of natural chemicals (enzyme inhibitors) that are impossible for human stomachs to break down and can cause digestive stress in sensitive tummies. Soaking nuts in water with a little bit of salt is a simple way to ensure nuts are more digestible.
Once the enzyme inhibitors have been broken down and washed away our body can then actually absorb the nut’s abundant nutrients. You might imagine that all those toxins don’t actually taste that great. And you’re right; activated nuts produce a yummier tasting milk. And finally, if you need any more persuading, the last activation pay-off is that soaked nuts soften and blend quicker to produce a rich, creamy milk.
Running the nut milk through a cloth bag is not essential. Leaving the skin fibre and pulp in nut milk will result in a wickedly hearty, prebiotic pumped, nut cream that contains the nutrient spectrum of the whole nut. Really it is up to your own textural preference. Pulp left in the milk will be grainy and chewy. Pulp free, will be smooth and creamy. If you plan to only use nut milk in smoothies – leave it in and a feed your gut microbes all that nut fibre!
If you want to sieve, a cloth nut bag makes the process a cinch. A square piece of muslin cloth does the same job, but the process can get rather messy. Before you begin – watch our ‘how to’ video.
BASE RECIPE
1 ½ cups of raw almonds
1 teaspoon of salt (for soaking)
Water for soaking
2 tablespoons of raw honey or maple syrup
1 teaspoon of vanilla
4 cups of chilled water (for milk)
FOR CARAMEL NUT MILK - ADD
2 – 4 medjool dates (pips removed)
Pinch of salt
FOR CHOCOLATE NUT MILK - ADD
2 – 3 tablespoons of cacao powder
FOR CINNAMON NUT MILK – ADD
1 teaspoon ground cinnamon

1. Pour the almonds into a large ceramic bowl, add 1 teaspoon of salt and fill with water. Cover the soaking nuts with a clean tea towel and leave to sit for 8 hours or overnight.
2. Pour the soaked nuts into a sieve and thoroughly rinse with running water.
3. Pour the activated nuts into a blender. Add 2 cups of water and blend on 'nut mode' for 60 seconds or until the nuts are a creamy paste. Note: Power blenders heat the contents of the jug very quickly because of the power and speed of the blades. To ensure the nut milk stays raw, watch the temperature does not go above 42 ºC (107 ºF) and add chilled water in step 5.
4. Add the raw honey and vanilla then pulse to combine.
5. Finally, add 2 further cups of chilled water and blend for up to 60 seconds, watching the temperature to ensure the milk does not heat above 42 ºC (107 ºF)
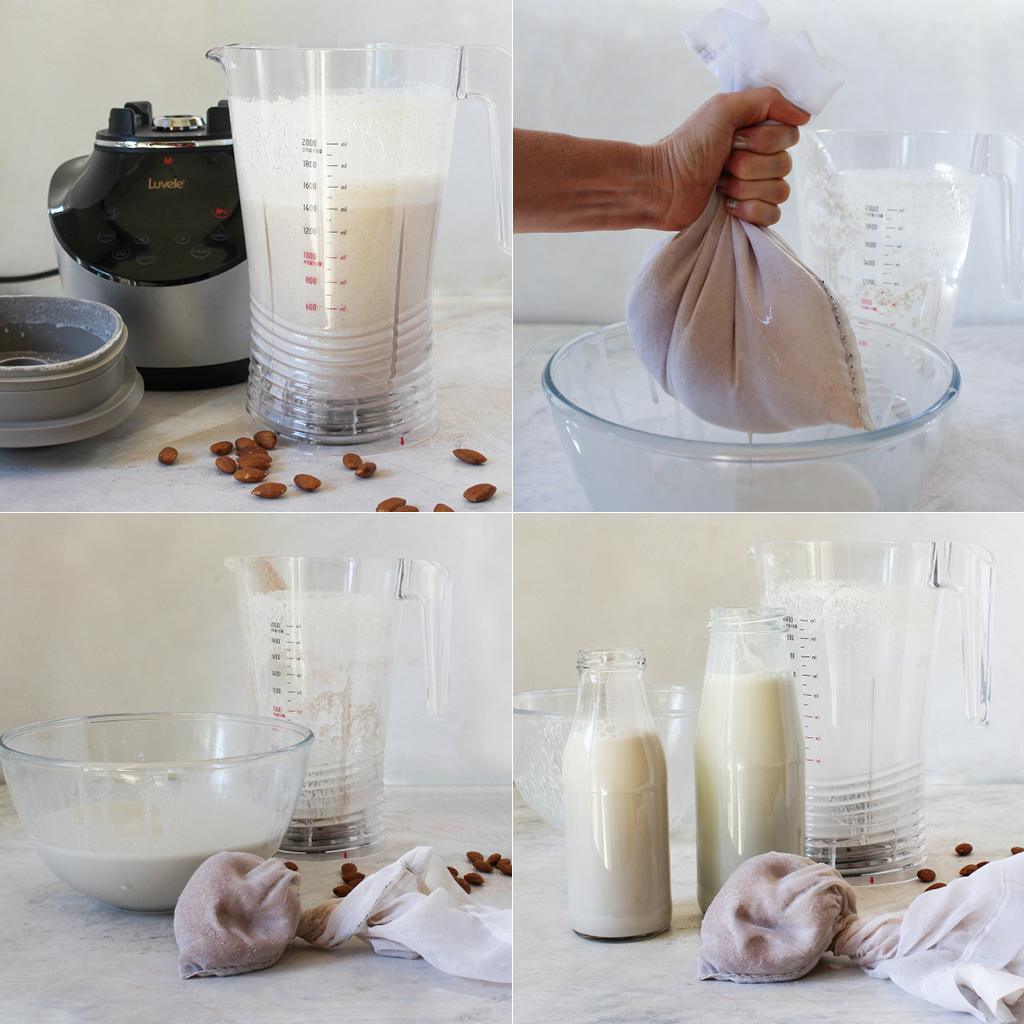
6. For a smooth milk run the blended nuts through a nut bag or a piece of muslin cloth to remove the pulp. This step takes a bit of practice and can be messy.
Twist and squeeze the bag until all the moisture is removed and only dry pulp remains. Watch our Youtube video for how to.
7. Pour the nut milk into glass jars and store in the fridge until ready to use. Nut milk tastes amazing straight from the blender but it’s really lovely chilled and is best consumed in 3 or 4 days.
Do you love plant based milk yogurt? Learn how to make almond milk yogurt here.
The left over pulp can be added to homemade Granola or cakes, biscuits and muffins. Store it in the fridge for a few days or I keep it air-tight in the freezer until you’re ready to use it.